NestJS
NestJS는 node.js 위에서 움직이는 프레임워크이다. express 위에서 움직이는 것이기도 하다.
express로 api를 만든다고 치면, url를 어디에 둘지도 마음대로 정할 수 있다. 컨트롤러나 템플릿도 마찬가지이다.
NestJS에서는 그럴 수 없다. NestJS는 구조가 있다.
하지만 그 구조 덕분에 순서와 룰도 있어 이를 따르기만 하면 큰 규모의 백엔드를 쉽게 만들 수 있다.

Setup
가장 먼저 해야하는 것은 @nestjs/cli를 설치하는 것이다.
cli를 깔게 되면 우리가 사용해야할 기본적인 셋업을 제공하여 개발하기 편하게 해준다.
npm install -g @nestjs/cli
nestnest를 커맨드하면 설치가 되었는지 확인 가능하며 nest에 사용할 수 있는 다른 커맨드를 알려준다.
nest new커맨드하게 되면 프로젝트 디렉터리명을 입력하게 된다.
모든 작업을 마치면 지정한 디렉터리가 생길 것이고 해당 디렉터리에 Setup이 되어 있을 것이다.
NestJS Architecture
NestJS 애플리케이션은 main.ts에서 시작한다.
// main.ts
async function bootstrap() {
  const app = await NestFactory.create(AppModule);
  await app.listen(3000);
}
bootstrap();
보이는 것처럼 하나의 모듈(AppModule)에서 애플리케이션을 생성한다.
// app.module.ts
@Module({
  imports: [],
  controllers: [AppController],
  providers: [AppService],
})
export class AppModule {}
AppModule은 모른 것의 루트 모듈 같은 것이다. 모듈이 뭐냐?, 애플리케이션의 일부분이다.
예를 들면, 인증을 담당하는 애플리케이션이 있다면, 그게 users 모듈이 될 것이다.
여기서 알아야 할 중요한 건, 첫 번째, controller와 나머지 하나는 provider이다.
컨트롤러가 하는 일은 기본적으로 url을 가져오고 함수를 실행하는 것이다.
express로 따지자면 라우터 같은 존재라고 보면 된다.
// app.controller.ts
@Controller()
export class AppController {
  constructor(private readonly appService: AppService) {}

  @Get()
  getHello(): string {
    return this.appService.getHello();
  }
}
컨트롤러 파일을 보면 Get 데코레이터가 있다. 이게 express의 get 라우터와 같은 역할을 한다.
// app.controller.ts
@Controller()
export class AppController {
constructor(private readonly appService: AppService) {}
@Get()
getHello(): string {
return this.appService.getHello();
}
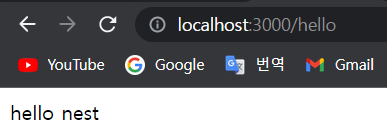
@Get('/hello')
sayHello(): string {
return 'hello nest';
}
}예를 들어 누군가 /hello로 들어오게 된다면 sayHello라는 함수를 실행하게 된다.
여기서 주의할 점은 데코레이터는 꾸며주는 함수나 클래스랑 붙어있어야 한다.
위와 같이 string값을 리턴하면 그대로 브라우저에서 작동하는데, 왜 서비스가 필요할까?
NestJS는 컨트롤러를 비지니스 로직이랑 구분 짓을려고 한다.
컨트롤러는 그냥 url를 가져오고 함수를 실행하는 역할일 뿐이다.
나머지 비지니스 로직은 서비스로 간다.
서비스는 일반적으로 실제로 함수를 가지는 부분이다.
// app.service.ts
@Injectable()
export class AppService {
  getHello(): string {
    return 'Hello World!';
  }
}
AppService라는 클래스안에 getHellog라는 이름의 간단한 함수가 들어있다.
위의 sayHello라는 함수를 NestJS의 방법대로 따른다면 이렇게 할 수 있다.
@Injectable()
export class AppService {
  getHello(): string {
    return 'Hello World!';
  }

  sayHello(): string {
  	return 'hello nest';
  }
}
@Controller()
export class AppController {
constructor(private readonly appService: AppService) {}
@Get()
getHello(): string {
return this.appService.getHello();
}
@Get('/hello')
sayHello(): string {
return this.appService.sayHello();
}
}이렇게 하면 그냥 this.appService.sayHello() 값을 리턴할 수 있다.
컨트롤러의 sayHello()와 서비스의 sayHello()의 이름이 같지 않아도 된다.
그저 컨트롤러의 sayHello()를 실행하면 서비스의 sayHello()를 리턴해주는 것이다.
마무리
개인 프로젝트나 간단한 프로젝트 시에 NestJS를 이용하여 진행해볼 생각에 공부하고자 한다.
우선은 NestJs를 이용하여 REST API를 만드는 것을 알아가보려고 한다.
'BACKEND > NestJS' 카테고리의 다른 글
| NestJS로 API 만들기 (Feat. TypeScript) (1) | 2023.06.05 |
|---|